In the last five sessions of this non-fiction writing course we’ve looked at different writing styles, genre and markets for non-fiction writing. I hope by now that you have got an idea of what you would like to write about and started researching it. Whether it’s a travel article, an autobiographical piece or a general feature article for the magazine of your choice, you should be ready to write something up. Successful Non-fiction Writing by Nicholas Corder has an excellent chapter on writing-up and you may like to refer to it after you’ve read this post. So it will come as no surprise to you that this week we are looking at how to write a feature article for a magazine.
We have not looked at interview features in this course, but I will be doing so at a later date. The difference between an interview feature and a specialist feature is that in the former you are quoting someone else and writing an article about their experience; in the latter, you use your own opinions, experiences and specialist knowledge.
Research
I like to compile a ‘cue sheet’ for my background research, listing relevant page numbers, paragraphs etc in other books, highlighted sections of internet articles, clippings from brochures and so on. If I’ve made notes of my own thoughts and ideas I use this as a skeleton and intersperse research from other sources between my own work wherever I need to back-up or expand on my own ideas. Be careful though to make it clear when you are referring to someone else’s idea and not to pass it off as your own. We will be looking more at copyright and libel in a later session.
Once you have your cue sheet compiled, you should read through it a few times and make notes of potential angles, starting points and so on. For example, an article on violin making could have a historical angle, a craft angle, a music angle or a commercial angle. You may of course have already decided on your angle before doing your research, so that is the one you need to take. If not, see which angle is the most strongly suggested from the material at hand and go with it.
Exercise 19:
Gather together all your research and compile a cue sheet. If you haven’t done any research yet, go away, do some, then come back and do this session later.
The Intro
This is the springboard for the rest of the article. I usually start with a factual one, just to get started, then make it a bit more appealing later on. For example:
In the 19th Century the small village of Yetholm on the Scottish and Northumberland border used to be the seat of the so-called Gypsy Royal Family…
This was my working intro for my article The Last of the Gypsy Royals. I never intended it to be the final intro, but it was enough to get me going. In it I have the ‘Who? Where? When and What?’ that we discussed in the earlier session on non-fiction writing style.
- Who? the Gypsy Royal Family
- Where? Yetholm on the Scottish / Northumberland border
- When? The 19th Century
- What? Was the seat of the so-called Gypsy Royal Family
This intro establishes the angle I’m going to be taking in the article: historical and regional. However, as I started writing the article I realised I needed to sex it up a bit. One of the fascinating titbits I came across was the Bill Clinton connection. There was also something about Hilary Rodham, but this was more speculative. So I decided to put it in the intro as a hook, even though the article has little, if nothing to do with the former president of the United States. Shameless, I know, but it served me well when I tried to re-sell the piece to the American market. So I reworked the intro to read:
It’s rumoured that Bill Clinton is one of their descendents, but the gypsies of Yetholm on the Scottish and Northumberland border have more than an American president to their name. We look back on the lineage of one of Britain’s less known royal families.
Note, the ‘rumoured’ covers my butt in case historical purists question my sources! And speaking of sources …
Sources
In articles for popular magazines, unlike non-fiction books, one does not generally quote one’s sources in the article. It all depends on the publication though, and some mags that I write for do require it. The Northumbrian, the magazine I originally produced this piece for, didn’t require it. But if it did, I could either put in a numbered footnote or in the text itself .
One of my primary references for this article was a book written in 1885. I would simply have to reference: “Brockie, William, ‘The Gypsies of Yetholm’. 1885.” Note, this isn’t the detailed annotation of an academic article. I didn’t have this in the original article, but I was able to look back in my notes from four years ago and find it. What does that tell you? Even though you don’t always have to provide references and sources in commercial magazine text, you need to be able to account for them if questioned. In fact, for legal reasons, you need to keep all notes, interviews, pictures and recordings for five and a half years after the article is published. We will be discussing this further in the session on copyright, libel and finance.
Exercise 20:
If you have done your research, write a working intro for your article using the Who? Where? When? What? Formula. Remember, the why and the how should be developed in the main body of your article.
The Main Body
Very basically, an article has to have a beginning, middle and end. You’ve already established your beginning with the intro, now you need to develop your argument to reach a conclusion. This assumes, of course, you know where it’s going to end up. I believe that you shouldn’t start an article until you know where it’s going to finish. What do you want to say through this article? Take the Gypsy Royal piece for example. After all my research I was saddened to discover that this royal family became a comical parody of the Hanoverian royal family in London. It was a publicity grabbing, tourist attracting farce. It may not have started out that way, but that’s where it ended up. So that was the ‘arc’ of my article. How the royals came into being, a few glory years, then their sad demise into obscurity.
That was actually the middle and end of the article, what became the beginning was the background to the gypsies in the region. So the start of my article focused on the royals then backtracked through a bit of their history, then by mid-way came back to the royals again, then moved towards its conclusion which was how the family slipped into a historical no-man’s land. This is classic three act structure, borrowed from fiction and dramatic writing. Thus my outline for the Gypsy article was:
- Intro: Clinton connection
- Focus on Kirk / Town Yetholm
- Establish gypsies in area
- Develop Clinton connection
- Jemmy Allen (a well-known historical personalilty that many people will have heard of)
- Go further back in gypsy history to establish roots in region, background of persecution + brigandery
- Roots of royal connection
- Where did gypsies come from?
- Bring back to royals: Queen Esther
- Victorian tourist attraction
- Demise of royals
- Attempted revival under Charles
- Fade into obscurity
- Conclusion: bring back to the pub
Bringing it to a close
Of course the order of the article changed a few times, but this is what I finally settled on. Note also that the conclusion brings the article full circle to the photos in the pub. This is not essential, but it’s a comfortable way to bring unity to an article.
Exercise 21:
Review your research, establish your intro, decide where you’re going to end up, then, in bullet form, sketch how you might get there with the material available to you.
Feature article layout
- Cover page: this is best done once the article is written. In the middle of the page include name of article, your name, word count, the phrase: ‘First British Serial Rights Only’ (or North American, Australian etc) with the date of submission below it. This establishes your copyright from that date. At the bottom left repeat your name, address, telephone number and email. We will be looking at Serial Rights in a later session.
- Heading / title: take your cue from others in your targetted magazine. Remember this is just a suggestion and might be changed by the editor.
- Slug: a one word label, this will be your file name, picture name etc. eg GYPSY. Set up your header / footer with ‘slug’ plus your name eg GYPSY, Fiona Veitch Smith and page numbering.
- Blurb: If your targetted magazine uses blurbs, you may write one – the editor may change it though. Eg: Fiona Veitch Smith discovers a most unusual royal line. This should be separate from your intro; I usually put mine in bold. If the magazine doesn’t use them, don’t write one.
- Spacing: present your document as double or 1.5 spacing on one side of A4. Use simple font: Arial, Times Roman or Courier 12 pt. Do not put your text in columns or in any way try to mimic the layout of a magazine page.
- Paragraphing: this can either be with indents (standard fiction presentation) or with double spaces between paragraphs. Paragraphs should be kept short: max 60 words (two to three sentences). Sometimes one sentence can be a paragraph.
- Word count: of main body only. Note this at the end of the document and on the cover page. Your word count will be determined by the magazine requirements – either in contributors’ guidelines or agreed between you and the editor. You should also include a word count for each of your sidebars – but not on the cover page.
- Captions: Include in the same document as your article. Make sure they have the same ‘slug’ as your article, eg GYPSY 1; GYPSY 2 etc., as the layout sub-editor needs to match the pictures to the ‘copy’ (your text). A caption should be no longer than two short sentences and should describe who is in the picture, what they are doing, and, if possible, tie in to a point you have made in the article. Make sure you give the full name of everyone in the picture (unless a huge crowd). If you don’t have them, use another picture. Submit pictures as separate files as an email attachment (with same slug) – 300 dpi jpg, or as jpgs or bmps, tifs or gifs on a disc if sending in hard copy. You can also submit a draft paper printout of each pic for reference. Hand write the slug on each page.
- Sidebars: Factual info that doesn’t fit in with the flow of your article can be added in a ‘sidebar’. Be prepared that the editor may cut these for space, or use them for padding. These are most frequently used in travel writing.
- MORE … Some people write this at the bottom of every page. I only do this if submitting hard copy. Electronic copy can throw out formatting so ‘more …’ might appear halfway down a page. For this reason I don’t use MORE when sending via email, but many writers still do. If you have a word processing programme that can place it as a footer, then do so.
- ENDS Write this at the end of your document so the editor knows there isn’t any more to come.
Exercise 22:
You should now be ready to write the first draft of your article – do so. Don’t be scared to get something down on paper. Remember, this is a first draft and can be changed.
Critiquing service
If you have written an article and are considering sending it off to a magazine, don’t forget that I offer a critiquing service. There is a charge for this, but bearing in mind that it’ll likely improve your chances of publication, it may be worth your while.
In the next session we’ll look at writing a proposal for your book or magazine article and how to approach editors.
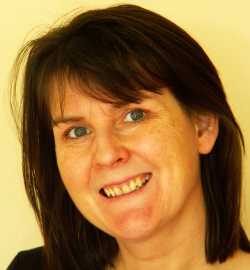 Welcome to The Crafty Writer's free online non-fiction writing course, presented by Fiona Veitch Smith, a freelance journalist, editor, author, playwright, screenwriter and writing teacher. I hope that you'll see a dramatic improvement in the quality of your writing as you work through this course.
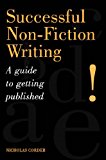
Your site is very helpful, especially this part. Will apply what you’re teaching here to a group project I started with a few friends. Thank you, Fiona. 🙂
You’re most welcome.
I got some scope through your service but one more clarification I need can write an article in a first person narrating point of view?
Yes you can.